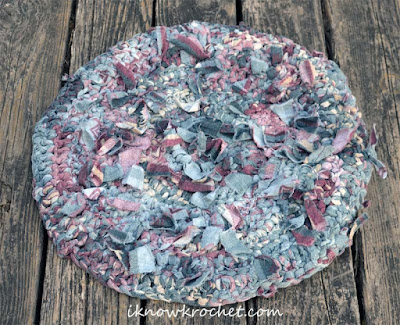
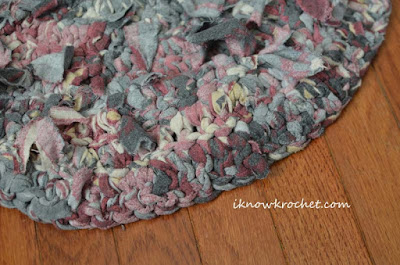
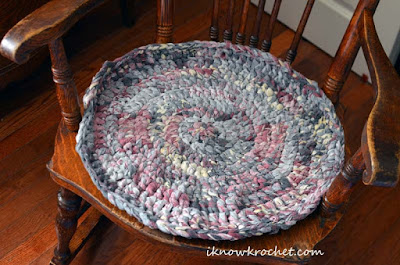
My family tends to run fabrics into the ground (i.e., we use clothing and other fabric items until a thrift store would probably throw them out if we donated them); so I have a lot of rags on hand. I use them mostly for cleaning, but when a decade-old fitted queen sheet recently ripped down the middle, I sought a better purpose for such a large piece of fabric. I decided to make it into a rocking chair pad.
I did not follow a pattern. I "winged it," and due to the forgiving nature of the fabric, I was able to obtain a more-or-less flat, round, rocking chair pad. I'm sharing the pattern that I came up with on the fly, but it is not perfect. Perhaps you can use it as a guideline to crochet a rocking chair pad from a queen sheet, if you are wondering how to get started.
Crochet Rocking Chair Pad Pattern
Abbreviations:
st = stitchsts = stitches
dc = double crochet
hdc = half double crochet
sc = single crochet
sl st = slip stitch
dc inc = double crochet increase (i.e., 2 dc in next stitch)
Materials:
- one old, 100% cotton flannel queen sheet, cut into a continuous strip about 0.75 inches wide
- a fitted sheet will work; just cut around the elastic
- see photo below showing how to cut a continuous strip of fabric
- Hook size N (10mm)
Gauge:
Notes:
- Crochet in a continuous spiral
- dc inc means 2 dc in next stitch
- dc 2 means 1 dc in each of next two stitches
- (.....)x3 means repeat what's in parentheses 3 times
Pattern
- Chain 2
- Round 1: 8 dc in second chain from hook (8 sts total)
- Round 2: dc inc in each st around (16 sts total)
- Round 3: dc inc in each st around (32 sts total)
- Round 4: dc inc in next 5 sts, dc 3, (dc inc, dc 2)x8 (45 sts total)
- Round 5: (dc inc, dc 2)x3, (dc inc, dc 3)x8, dc inc, dc 2 (56 sts total)
- Round 6: dc 2, (dc inc, dc 4)x11 (68 sts total)
- Round 7: (dc inc, dc 4)x4, dc 41, dc inc in next 3 sts, dc 2 (73 sts total)
- Round 8: dc 23, (dc inc, dc 5)x2, dc inc, dc 6, (dc inc, dc 5)x3, dc inc, dc 7, dc inc, dc 5 (82 sts total)
- Round 9: dc inc, dc 2, dc inc in next 5 sts, (dc inc, dc 6)x4, dc inc, dc 7, dc inc, dc 6, dc inc, dc 14, dc inc, dc 6, dc inc, dc 7, hdc 3 (94 sts total)
- Round 10 (finishing "round"): hdc 1, sc 15, sl st 6 (22 sts total)
Tips
This pattern is a good example of "winging it" as you go. Technically, it is my first original pattern, so I am happy to include it here for posterity (my hope is that it can be followed as a guideline, rather than ver batim). I hope that someday I'll be able to look back on it and see how far I've come in designing crochet patterns. I know there are spots that could be refined, but this rocking chair pad (aka "rag rug") turned out pretty good, despite the random nature of the pattern. The neat thing about this project is that I obtained a perfectly sized rocking chair pad from a single fitted queen sheet. The final diameter was 22 inches.
Making the fabric strips
I started by making approximately 0.75-inch wide strips (they ranged from 0.5 to 1 inch wide) following the lines in the sheet's pattern. To save my scissors, I cut about one inch to mark the strip width, then just tore the fabric the rest of the way. This worked well with a very old, 100% cotton flannel sheet. I'm not sure whether this would work with different or newer fabric. I started by tearing all the way through, then tying the strips together using square knots. I kept all of the knots on one side while crocheting. Here is a photo showing all of the knots on the back side.
I tore the strips as needed, so I had some sheet left when I was almost done and weary of trying to crochet over the knots (sometimes I felt like I was literally fighting the rug to complete a stitch). This is when a light bulb clicked on and I realized I could just leave the ends attached at the end of each strip to eliminate the need to tie any knots. This is the back of the rug showing how the outermost rounds do not have any knots. These rounds look much cleaner and were easier to crochet.
 |
| Backside of chair pad showing knots where pieces of fabric were joined |
I tore the strips as needed, so I had some sheet left when I was almost done and weary of trying to crochet over the knots (sometimes I felt like I was literally fighting the rug to complete a stitch). This is when a light bulb clicked on and I realized I could just leave the ends attached at the end of each strip to eliminate the need to tie any knots. This is the back of the rug showing how the outermost rounds do not have any knots. These rounds look much cleaner and were easier to crochet.
 |
| Backside of chair pad showing outermost rounds with no knots |
The picture below shows a portion of the original sheet from which I made the fabric strips for my rocking chair pad. Since the sheet pattern was based on stacked lines, it was natural to follow the lines while cutting the fabric strips. The black lines drawn on the photo show an example of where I cut to make a continuous strip and eliminate the need to tie pieces together with knots. To do this, cut (or rip) from one side, but leave about half an inch at the end of the fabric. Then, switch to the other side of the fabric, start cutting half an inch down from the previous cut (the cut that stopped 0.5 inch before the end of the fabric), and repeat. Alternate sides as you go. I also used the sewn edging on my final round, just to make use of all of the fabric. It was a bit narrower than the other strips, so it worked well as a finishing round and did not stand out in any noticeable way.
To make the continuous fabric even smoother, you could trim off the corners where two strips are joined at the end of a row, although it's unnecessary (I did not do this). I must admit the material was a bit "sticky," probably due to a combination of crocheting too tightly and using fabric, rather than yarn. The fabric naturally wrapped around my hook so it was slightly rounded as I went along. Nevertheless, my hands started to hurt as I fought the fabric. Remembering to crochet loosely helped a lot with this, as did eliminating the knots by cutting the fabric in a continuous strip. I also think that keeping the strips on the narrower side (0.5 inch) would help with this.
 |
| Black lines show where to cut on queen sheet to make a continuous strip of fabric |
To make the continuous fabric even smoother, you could trim off the corners where two strips are joined at the end of a row, although it's unnecessary (I did not do this). I must admit the material was a bit "sticky," probably due to a combination of crocheting too tightly and using fabric, rather than yarn. The fabric naturally wrapped around my hook so it was slightly rounded as I went along. Nevertheless, my hands started to hurt as I fought the fabric. Remembering to crochet loosely helped a lot with this, as did eliminating the knots by cutting the fabric in a continuous strip. I also think that keeping the strips on the narrower side (0.5 inch) would help with this.
Room for improvement
When I first started this project, the center bulged and looked like a pointy hat, but it flattened out as I added more rounds. In hindsight, I probably started with too many stitches in round one. I ended up with some ruffling, suggesting I added too many increases throughout the rug. I probably didn't need 2 dc stitches throughout the entire round three. Due to the fact that I didn't cut all the strips the same width, there were parts of the rug (for example, round 8) that were very thick in which I stuck with 1 dc per stitch, whereas other parts were thinner and I randomly added a dc inc to match the surrounding stitch thickness. Due to the fact that I crocheted this pad in a continuous round, I lost track of where a new round began, which is another explanation for the somewhat random appearing pattern. But despite the randomness, the pad turned out quite round. The nature of the fabric resulted in a very forgiving piece that flattened out well when I sat on it, which is why I'm calling this a rocking chair pad. To be honest, my original intent was to use it as a kitchen rag rug to go by the sink, but all of the knots on the bottom made it somewhat uncomfortable for my feet. I think this crochet seat pad turned out pretty and it fits perfectly on our antique rocking chair!The most important thing I'd do differently next time (if using a queen sheet) is to cut a continuous fabric strip from the very beginning to avoid all of those knots. As far as pattern designs go, the main issue I have with this pattern is that it is not intuitive (again, this is because I winged it). I didn't write down any part of the pattern until the project was completed. Although I am a perfectionist and debated whether to refine this pattern before posting it, I am posting this "prototype" version because it shows how winging it can turn out nicely. Please use this pattern as a guideline, and be willing to modify as you go to adapt to the unique variations in your fabric strip. The whole reason I came up with my own design is that I didn't want to constantly have to refer to a pattern while working on such a casual project, and I would suggest you consider doing the same. Also, after crocheting so many beanies, I figured the pattern should just start the same way as the first part of a beanie or pot holder (I just neglected to refer to one of those patterns to refresh my memory before starting the project). If you are looking to repurpose a queen sheet to make a crochet rocking chair pad, then I'd be happy to hear how it turns out if you choose to follow this pattern as a guideline. If you are not feeling that adventurous, then my next suggestion would be to either find an actual crochet rag rug pattern or work from a potholder pattern.
I'm excited that I found a use for this sheet other than turning it into cleaning rags! I think it would have also made a great cat bed if I had added sides to give it a bowl shape.
Do you have any other great crochet ideas for repurposing a queen sheet?


